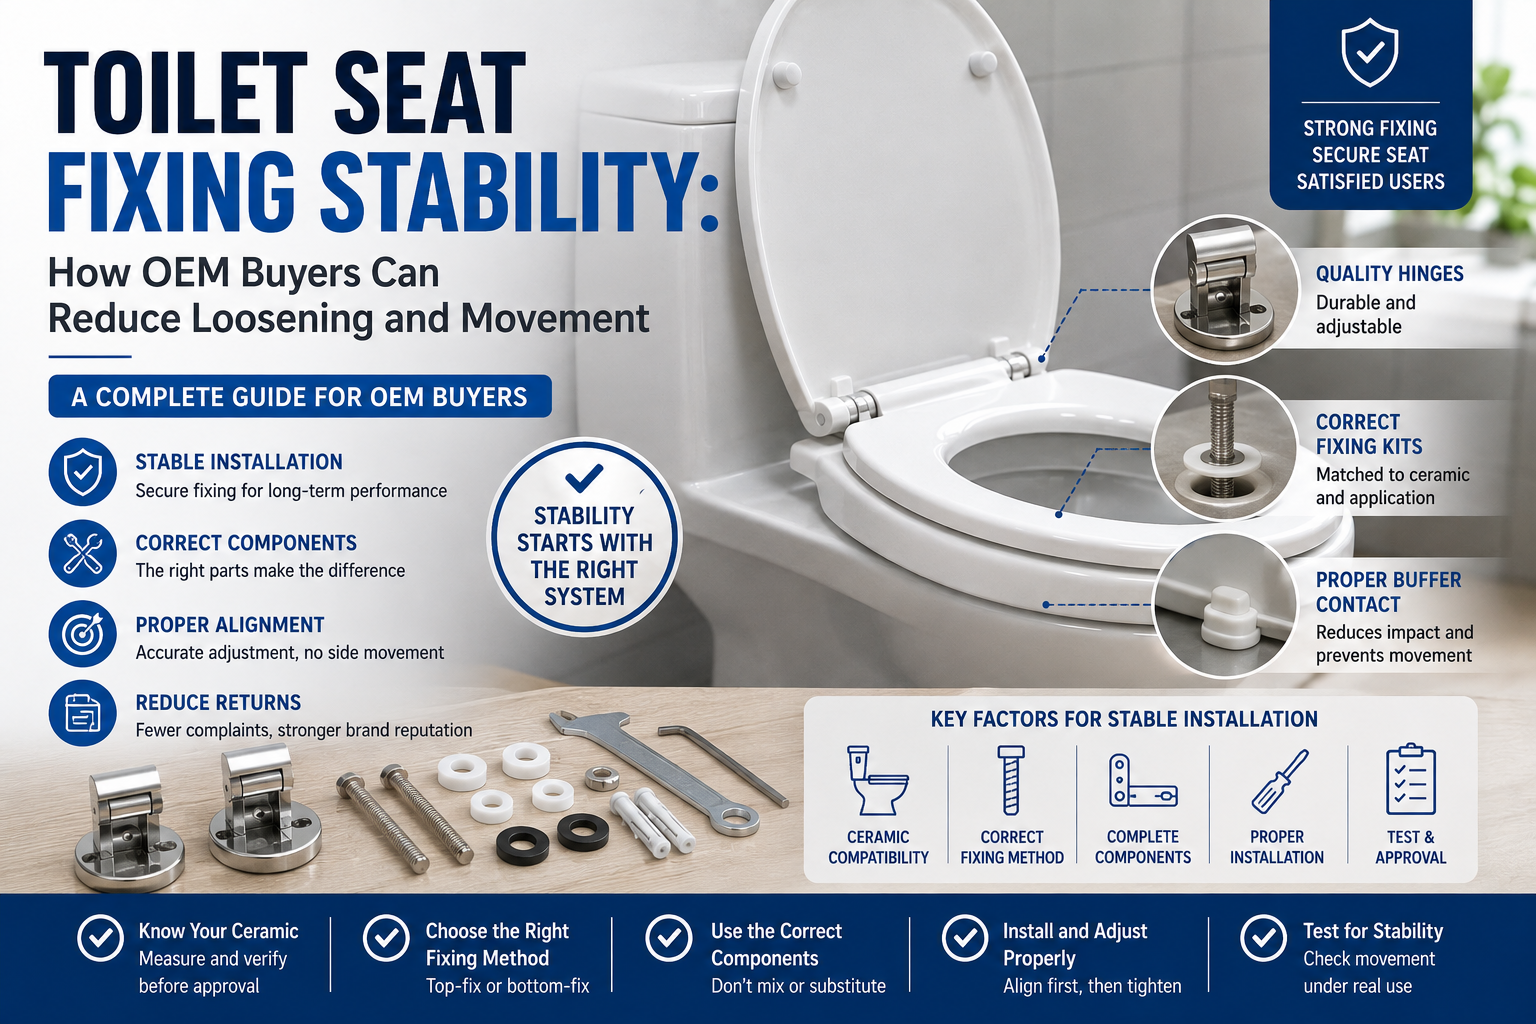
Toilet Seat Fixing Stability: How OEM Buyers Can Reduce Loosening and Movement
A toilet seat that moves sideways after installation is often described as a hinge-quality problem. The actual cause may involve the ceramic, fixing kit, hinge adjustment, buffer contact, installation sequence or product configuration.
For distributors, sanitary ware brands, project buyers and retailers, stability should be evaluated as a complete installed system.
That system includes:
- Ceramic mounting area
- Mounting holes
- Seat and lid
- Hinge bases
- Bolts
- Washers
- Nuts or expansion plugs
- Adjustment plates
- Buffers
- Installation method
- Tightening process
A stable sample on one toilet bowl does not automatically prove that the product will remain stable on every ceramic described as round, elongated or D-shaped.
The buyer should define the intended compatibility range and verify the complete assembly before bulk approval.
Why Toilet Seats Become Loose
Common causes include:
- Incorrect fixing method
- Insufficient access beneath the ceramic
- Mounting holes outside the hinge adjustment range
- Oversized ceramic holes
- Unsuitable expansion plugs
- Incorrect washer orientation
- Uneven ceramic surface
- Hinges tightened before alignment
- Insufficient tightening
- Excessive or damaging tightening
- Missing components
- Incorrect buffer contact
- Product overhang creating leverage
- Unapproved replacement hardware
- Movement after repeated use
- Installation instructions that do not match the supplied kit
The investigation should identify the actual cause before the supplier, installer or product design is blamed.
Start With the Ceramic Interface
The toilet bowl is part of the installation system.
Collect:
- Bowl length
- Bowl width
- Shape
- Mounting-hole spacing
- Mounting-hole diameter
- Distance from holes to front edge
- Rear-platform dimensions
- Surface curvature around the holes
- Top and underside access
- Cistern or wall clearance
- Photographs with measurements
- Ceramic model number
For a sanitary ware company, use the actual ceramic drawing and a physical sample where necessary.
For a replacement-seat distributor, define the dimensional compatibility range and communicate it accurately through packaging and product listings.
Avoid claiming “universal fit” solely because the hinge is adjustable.
Choose the Correct Fixing Method
Top-fix systems
Top-fix hardware is installed and tightened from above the toilet bowl.
It can be useful when:
- The underside is enclosed
- Access below the holes is restricted
- The ceramic is back-to-wall
- Installation speed is important
- The selected expansion system suits the hole
The expansion plug, sleeve or insert must match the ceramic-hole diameter and approved tightening method.
Bottom-fix systems
Bottom-fix hardware passes through the ceramic and is tightened underneath.
It can be suitable when:
- The underside is accessible
- The installer can position the nut and washer correctly
- The ceramic structure supports the approved arrangement
- The buyer prefers a conventional through-bolt system
The buyer should not assume one method is inherently more stable. Stability depends on the complete fixing and ceramic combination.
Specify Every Fixing Component
A description such as “metal hinges with screws” is insufficient.
The product specification should identify:
- Hinge code
- Base-plate design
- Bolt material
- Bolt dimensions
- Washer material
- Washer dimensions
- Nut or locking component
- Expansion-plug material
- Plug dimensions
- Rubber sleeves
- Decorative covers
- Adjustment plates
- Installation tool
- Buffer quantity and position
If the supplier offers several fixing kits, the purchase order should state the exact approved kit.
BOFAN’s article on toilet seat spare-parts planning explains why visually similar bolts and hinges should not be treated as interchangeable.
Match the Fixing Kit to the Seat Material and Weight
PP, UF and MDF toilet seats may place different demands on their hinge and fixing systems.
Consider:
- Complete product weight
- Width and length
- Hinge mounting structure
- Lid opening leverage
- User environment
- Frequency of use
- Required adjustment
- Soft-close mechanism
- Quick-release system
A fixing arrangement suitable for a lightweight entry-level product may not provide the same stability with a heavier decorative model.
The buyer should approve the full production configuration, not a seat sample temporarily fitted with another hinge.
Check the Hinge Adjustment Range
Adjustability helps the installer center the product, but excessive or poorly controlled adjustment can create risk.
Verify:
- Minimum mounting-hole spacing
- Maximum mounting-hole spacing
- Forward and backward travel
- Side adjustment
- Base-plate rotation
- Locking method
- Contact area
- Position at the limit of adjustment
A seat may appear compatible at the extreme edge of the hinge range but have inadequate contact, poor overhang or limited stability.
Test representative ceramics near both the center and limits of the claimed compatibility range.
Align Before Final Tightening
The installation process should require preliminary positioning before the fixings are fully tightened.
Check:
- Front alignment
- Side alignment
- Seat centering
- Lid clearance
- Overhang and underhang
- Hinge symmetry
- Buffer contact
- Opening angle
After alignment:
- Tighten both sides gradually.
- Maintain the approved seat position.
- Avoid twisting the hinge bases.
- Confirm that washers remain correctly positioned.
- Complete the final tightening using the approved method.
- Recheck alignment and movement.
Installation instructions should not tell users merely to “tighten the screws” without showing positioning and component orientation.
Treat Buffers as Functional Components
Buffers help support the seat on the ceramic.
They can influence:
- Vertical support
- Lateral movement
- Noise
- Load distribution
- Ceramic contact
- Seat flex
- User comfort
Check:
- Buffer quantity
- Buffer location
- Buffer height
- Material and hardness
- Contact with the actual bowl
- Contact when the seat is loaded
- Gaps or rocking
If one or more buffers do not contact the ceramic, forces may be transferred unevenly to the hinges and fixings.
The solution may involve product selection, buffer configuration or ceramic compatibility—not simply tighter bolts.
Approve the Installed Sample
The approval should cover:
Static condition
- Seat is centered
- Hinges are aligned
- Fixings are fully engaged
- Buffers contact correctly
- Product does not rock
- Covers fit correctly
Opening and closing
- Seat and lid move freely
- Product does not shift
- Soft close operates correctly
- Lid clears the cistern or wall
- Hinges remain aligned
User movement
- No unacceptable lateral movement
- No lifting at hinge bases
- No component noise
- No visible washer or plug displacement
- Seat returns to a stable position
Quick release
- Product detaches correctly
- Bases remain fixed
- Product reinstalls securely
- Stability remains acceptable after refitting
Record the ceramic model, hinge code, fixing kit and installed photographs with the approval.
Define a Repeatable Stability Test
“Does not wobble” is not a complete test specification.
The buyer and supplier should define:
- Product and ceramic used
- Installation method
- Tightening method
- Conditioning period
- Direction of force
- Force or movement applied
- Number of repetitions
- Measurement point
- Allowable movement
- Retightening policy
- Failure criteria
- Inspection record
Depending on the buyer’s program, testing may include:
- Manual movement check
- Defined lateral-force test
- Opening-and-closing repetition
- Load or sitting simulation
- Quick-release removal and refitting
- Post-cycle fixing inspection
Any stated test result should be connected to the exact model, hinge and fixing arrangement.
Check Stability After Functional Cycling
Fixings that appear stable immediately after installation may loosen after repeated movement.
After the agreed cycle or use simulation, check:
- Bolt rotation
- Nut movement
- Expansion-plug movement
- Hinge-base displacement
- Change in seat alignment
- Increased lateral movement
- Buffer contact
- Cracks or deformation
- Soft-close operation
- Quick-release engagement
The test plan should state whether retightening is allowed. If the product is retightened during the test, that action should be recorded.
Evaluate Installation Repeatability
A system that works only when installed by one experienced engineer may not be suitable for retail or large projects.
Use several installers or repeated installations to evaluate:
- Ease of component identification
- Time required
- Risk of incorrect orientation
- Ability to center the seat
- Access to tightening points
- Tool requirements
- Consistency of final stability
- Common installer mistakes
For multi-unit projects, a pilot installation can reveal labor and training issues before hundreds of seats reach the site.
BOFAN’s solutions for projects and contractors support discussions around ceramic fit, installation consistency and standardized bulk supply.
Test the Instruction Sheet
The installation instructions should show:
- Complete component map
- Top-fix or bottom-fix method
- Washer and plug orientation
- Preliminary positioning
- Alignment
- Final tightening
- Stability check
- Quick-release operation
- Periodic maintenance
- Troubleshooting
Ask someone unfamiliar with the product to install it using only the supplied components and instructions.
If the installer uses the wrong washer position or tightens the hinge before alignment, improve the instruction rather than assuming every future user will understand the mechanism.
Control Tightening Requirements Carefully
Insufficient tightening can leave the product unstable. Excessive tightening may damage components or the ceramic.
Where the system requires a controlled tightening method, confirm:
- Tool
- Sequence
- Whether both sides are tightened alternately
- Required stopping point
- Torque requirement if defined for the product
- Retightening requirement
- Restrictions on powered tools
Do not add a numerical torque instruction unless it has been validated for the exact bolt, plug, washer and ceramic arrangement.
Include Stability in Production Inspection
Factory inspection may verify:
- Correct fixing-kit code
- Component quantity
- Bolt and washer dimensions
- Hinge-base assembly
- Expansion-plug condition
- Buffer position
- Quick-release engagement
- Functional movement
- Installed stability on an agreed fixture or ceramic
- Packaging completeness
For final shipment inspection, identify:
- Purchase order
- Buyer SKU
- Factory model
- Batch
- Hinge code
- Fixing-kit code
- Sample quantity
- Test method
- Findings
- Corrective action
- Result
BOFAN’s quality-control process and guide to OEM quality consistency provide starting points for defining product-specific inspection controls.
Prevent Unapproved Fixing Changes
Changes to small hardware components can affect installation significantly.
Review any proposed change to:
- Bolt length
- Bolt diameter
- Thread
- Washer size
- Washer material
- Nut design
- Expansion-plug dimensions
- Rubber hardness
- Hinge base
- Adjustment plate
- Buffer height
The change review should consider:
- Ceramic compatibility
- Installation method
- Adjustment range
- Stability
- Packaging
- Instructions
- Spare parts
- Existing inventory
- Applicable test evidence
Written approval should identify the first production batch using the revised system.
Investigate Movement Complaints
Collect:
- Product SKU
- Batch code
- Ceramic photographs
- Mounting-hole dimensions
- Installation photographs
- Photographs underneath the ceramic where accessible
- Complete fixing-kit photographs
- Video showing movement
- Time since installation
- Installer type
- Whether the product was retightened
- Number of affected products
- Whether the issue occurs on one or several ceramic models
Separate:
- Incorrect installation
- Wrong fixing kit
- Incompatible ceramic
- Missing components
- Loose hardware
- Hinge-component defect
- Buffer-contact problem
- Product deformation
- User-damage incident
BOFAN’s article on reducing toilet seat returns explains why fit, installation, hardware and product defects should be recorded as different return categories.
Plan Maintenance and Spare Fixings
For hotels, apartments and commercial buildings, document:
- Installed product model
- Ceramic model
- Hinge code
- Fixing-kit code
- Initial installation date
- Approved installation method
- Inspection schedule
- Retightening guidance
- Compatible spare parts
- Replacement history
Do not allow maintenance teams to replace the original fixings with unidentified local hardware without evaluating compatibility.
Standardizing selected fixing kits across compatible products may simplify training and spare-parts inventory.
Fixing-Stability Approval Checklist
Before placing a bulk order, confirm:
- Intended ceramic dimensions are documented.
- Mounting-hole diameter and spacing are known.
- Top or bottom access is confirmed.
- Exact hinge and fixing-kit codes are recorded.
- Every fixing component is specified.
- The system suits the product material and weight.
- Adjustment is not approved only at its extreme limit.
- Buffers contact the ceramic correctly.
- Alignment occurs before final tightening.
- The installed sample is stable.
- Soft-close and quick-release functions are tested.
- A repeatable stability test is defined.
- Stability is rechecked after repeated movement.
- Installation instructions match the fixing kit.
- Production inspection verifies component identity.
- Hardware substitutions require written approval.
- Complaint evidence requirements are established.
How BOFAN Supports Fixing-System Selection
BOFAN can review suitable hinge and fixing options for approved PP, UF and MDF toilet seat models.
Depending on the project, support may include:
- Ceramic-drawing review
- Top-fix and bottom-fix options
- Hinge-adjustment confirmation
- Complete fixing-kit identification
- Installed-sample preparation
- Soft-close and quick-release configurations
- Functional and stability inspection discussions
- Installation-information coordination
- Spare-component review
- Repeat-order change control
Final compatibility should be confirmed through installation on the intended ceramic and the agreed product-specific testing.
CTA
Experiencing loose or unstable toilet seats in a current program? Send BOFAN the seat model, ceramic dimensions, hinge and fixing photographs, installation information and complaint evidence. The team can help review possible compatibility and fixing-system causes.
Request a Fixing-System Review
FAQ
Why does a toilet seat move after installation?
Possible causes include incorrect fixings, poor alignment, unsuitable ceramic holes, insufficient tightening, missing washers, inadequate buffer contact or incompatible hinge adjustment.
Is top fixing more stable than bottom fixing?
Not automatically. Either system can perform well when its components, installation method and ceramic interface are suitable.
Can one fixing kit fit every toilet bowl?
No. Hole diameter, spacing, access, ceramic shape and mounting-surface geometry can differ. Compatibility must be confirmed for the intended range.
Why are toilet seat buffers important?
Buffers support the seat on the ceramic, distribute forces and help control movement. Incorrect height or contact may increase instability.
Should a toilet seat be retightened after installation?
Follow the product-specific installation and maintenance instructions. Any required post-installation check should be stated in the approved guide.
How should lateral stability be tested?
Use an agreed installed product, ceramic, force direction, repetition, measurement and acceptance criterion. Avoid relying only on an informal hand check.
Can soft-close hinges cause a seat to become loose?
Soft close itself is not necessarily the cause. Product weight, hinge alignment, fixing security and repeated movement should be evaluated together.
Can BOFAN review a customer’s existing ceramic and fixing system?
BOFAN can review drawings, measurements, photographs and physical samples where arranged. Final compatibility should be approved through an installed sample.
Table of Contents
- Toilet Seat Fixing Stability: How OEM Buyers Can Reduce Loosening and Movement
- Why Toilet Seats Become Loose
- Start With the Ceramic Interface
- Choose the Correct Fixing Method
- Specify Every Fixing Component
- Match the Fixing Kit to the Seat Material and Weight
- Check the Hinge Adjustment Range
- Align Before Final Tightening
- Treat Buffers as Functional Components
- Approve the Installed Sample
- Define a Repeatable Stability Test
- Check Stability After Functional Cycling
- Evaluate Installation Repeatability
- Test the Instruction Sheet
- Control Tightening Requirements Carefully
- Include Stability in Production Inspection
- Prevent Unapproved Fixing Changes
- Investigate Movement Complaints
- Plan Maintenance and Spare Fixings
- Fixing-Stability Approval Checklist
- How BOFAN Supports Fixing-System Selection
-
FAQ
- Why does a toilet seat move after installation?
- Is top fixing more stable than bottom fixing?
- Can one fixing kit fit every toilet bowl?
- Why are toilet seat buffers important?
- Should a toilet seat be retightened after installation?
- How should lateral stability be tested?
- Can soft-close hinges cause a seat to become loose?
- Can BOFAN review a customer’s existing ceramic and fixing system?